The screen flickers into black, it comes back and on-screen there is a message Driver stopped responding and has recovered. If you have been through this you are aware that the issue is not serious but it can get pretty annoying fast since you are not aware when will it happen again, and it will happen again.
In this guide, we will go through the usual reasons for this error and offer solutions to them. Follow the guide step by step in order to resolve the problem.
Clean your PC
Dirt and dust are your enemy no1, dirty graphic card can not be properly called and can cause overheating which can result in this particular error, make sure that your PC is clean and tidy in order to eliminate dust and dirt as a cause for malfunction.
Turn off multiple applications and try running just one at a time
Overburdening GPU can cause this error to appear since the graphic card can not handle all requests it gets from multiple active applications. Try to run just one application at a time for some time period to see if the error will appear again.
Update driver
Update your GPU driver to the latest version from the manufacturer's website, Display Driver Stopped Responding and Has Recovered Error in Windows 10 can be from outdated drivers not able to handle modern tasks
Get newer GPU
As hard as this advice is, sometimes the reason is an old graphic card that simply can not keep up with modern games and applications, upgrade it to a more modern GPU and watch errors go away.
Windows Updates are important and though it is not recommended for any user to turn it off completely, there are just some remote cases where you might have to keep it off. Such are the cases when you want to use your Windows 10 computer just for gaming and you don’t want Windows Update to interrupt it because of some messy driver update. A lot of users have in fact want to disable Windows 10 updates completely. Although you can always use the built-in option to delay Windows Updates or make Windows 10 inform you before downloading the updates, however, there are instances when Windows 10 Update may enable itself even after you turn it off or delay it. To resolve this issue, read on.
You may have to disable the Windows Update Medic Service if Windows Update just keeps on starting and turning itself back on even after turning it off in Windows 10 on top of turning off the Automatic Windows Update Service or wuauserv and setting a Guest Log on. To get started, refer to the instructions prepared below.
Option 1 – Change the Log on account of the Windows Update Service
It appears that one of the major upgrades in Windows 10 has made sure that Windows 10 enables back the Windows Update Service all on its own even if the service has been set to disable by the administrator. And that’s the important thing here, Windows 10 uses admin credentials in order to ensure that it can re-enable the Windows Update Service each time it is in a disabled state. So in this fix, you can prevent the Windows Update Service from changing the account credentials used to run it.
Tap the Win + R keys to open the Run prompt with admin privileges.
Then type “services.msc” and click OK or hit Enter to open Services.
After that, locate the Windows Update Service from the list. Once you see it, double-click on it to open its Properties.
From there, click the Stop button to stop the service.
Next, go to the Log On tab and select the “Log on as ‘Guest” option which is the Guest account.
Just leave the password blank and then click Apply to save the changes made.
Note: After you made the changes, every time the Windows 10 Update Service attempts to run, you might get an error message that states, “Windows could not start the Service” or “The account specified for this service is different from the account specified for other services running in the same process”.
This is what makes this fix a lot better compared to other software or batch file to keep turning off the Windows Update Service. You did not exactly disable the service but you just changed the account used to run the Windows Update service and since there is a password, the service never really works. On the other hand, Windows Defender can’t be stopped using this trick as it will keep getting an update.
Option 2 – Try to disable the Windows Update Medic Service using the Windows Update Blocker
Aside from changing the Log on account of the Windows Update Service, there is also another way you can prevent the service from enabling itself after you disable it. This alternative you can use is the Windows Update Blocker. This is a new Windows Service that was introduced in the recent Windows 10 versions. You can use this service to disable the service.
Many of us are taking the google search engine for granted and it is no true that it has crawled in almost every spore of our digital lives but if we wanted a little more privacy? Do we have options or we are destined to use google and send our information to this company. What if we really wanted that our searches are well safe, secure, and private? We could try other search engines like BING but since BING belongs to Microsoft we would exchange only one company for another without making any progress in the privacy battle. Enter DuckDuckGo.
DuckDuckGo is a privacy-focused search engine that’s been online since 2008. Find websites, maps, videos, news, and more without tracking your searches and serving you targetted ads. It took DUckDuckGo as you can tell sometimes to gain ground and to be recognized but finally, it got the attention it deserves. Its big breakthrough happened in September of 2014 when Apple offered it as a default search engine in Safari and since it has gained more and more ground. It seems people care about their privacy after all.
Since then DuckDuckGo has been gaining ground and all the major browsers have integrated it as an option for a default search engine.
In this article, we will show you how to switch to DuckDuckGo and set it as your preferred search engine in all major browsers.
Google Chrome
Launch Chrome and click on the three dots in the upper right.
Choose settings.
Choose Search engine in the list on the left of the screen.
Click on the drop-down box next to Search engine used in the address bar and choose DuckDuckGo.
Mozilla Firefox
Launch Firefox, click on the three lines hamburger menu icon in the top-right corner of the window.
Click on Preferences.
Click on Search in the menu to the left of the screen.
Under Default Search Engine, click the drop-down box and choose DuckDuckGo.
Microsoft Edge
Click on the three dots menu button in the top-right corner of the window
Then select Settings.
Click on Privacy, Search and Services in the menu that appears on the left
Scroll down to the Services menu and choose Address bar and search.
Click the dropdown menu next to Search engine used in the address bar and choose DuckDuckGo.
Apple Safari
Click Safari in the menu bar at the top of the screen
Then click Preferences.
You can also use the Command+, shortcut to quickly bring up Safari’s Preferences.
Click on the Search tab, then choose DuckDuckGo under the Search engine drop-down box.
Opera
Click on the Settings cog button in the sidebar on the left of the screen.
Under Basic settings scroll down until you see Search engine and a drop-down box.
Select DuckDuckGo from the list.
If you own an iPhone, iPad, or iPod you might be aware of the phenomenon of connecting and disconnecting your device. In one moment device is connected and then it somehow loses connection and you have to plug in back again to be recognized.
In this troubleshooting guide, we will address ways to eliminate this issue and to connect and have your devices working properly. We will go from the most common ones to the most uncommon so it is advisable to try solutions in order to how they are presented.
Check cable
The most common issue with this kind of behavior comes from a broken cable if you have the opportunity try another working cable to see if the device will behave differently. If everything is working fine with another cable, the issue is in the previous cable.
Check USB ports and Cable Jack
Usually, it is a cable issue, but it can also be a USB jack on cable or even a USB port on a PC, try putting the jack into another port to see if this will solve the issue.
Check device settings
From updates on your device comes a change of setting about privacy which can reflect on connection with the computer. In order to eliminate this, you will need to reset your device.
Go to device settings and go to general
Scroll down until you find the reset section and go into it
In the reset, section click on reset location and privacy
You will have to authenticate using your pin/passcode in order to complete the reset function
Enter your passcode (or use any other authentication method you have chosen) and you can now reset the Location and Privacy settings.
Click on reset
Connect the device to PC and choose trust this device
Update iTunes
Outdated iTunes can also be a problem with this particular issue. Go to the apple website and download the latest version of iTunes or updating it via apple updater.
Sharing is caring, an old saying says. I completely agree and that is reason enough for this article filled with sharing goodness. Holidays are coming and I hope that the holiday spirit is strong with you, that you will spend them in peace and with loved ones. All that being said wouldn’t it be great if you can spend some joy with close ones and share some of your games on their account so they can enjoy them as well?
Well, you can and it is not complicated as well. Follow this easy guide to see how can you get someone’s account up and running with some of your games.
The steam Family sharing feature
The family Sharing feature inside Steam will let you share your games to another account so owners of that account can play games that you have purchased without the need to buy themselves. You can allow up to 5 accounts and 10 devices to play your library games, and owners of these accounts will have their own achievements.
Be aware that enabling this option will place your entire library on the share, you will not be able to choose which games you would like to share and therefore any kind of parental controls are not applying here. Also know that once the game is running on one device, others will have to wait for one playing to finish before they can get a spin on it.
Only the owner of the game can play whenever he wants as a priority but others will have to wait for the game to be not run by someone else.
How to Share Your Game Library
In order to share your game library have a person, you wish to share games with at his device on ready to go and enable steam guard on your account.
To enable steam guard login into your account and on the top left corner click on Steam and then on Settings. Inside settings click on the Manage Steam Guard Account Security button. Choose the way of authentication either by mail or steam guard mobile app. Check Get Steam guard codes by email radio button and re-login into account.
Sharing Games on another Steam account
Now that Steam Guard is enabled on the primary account let’s share some games!!!
Inside client again, in the top left click on Steam and again on settings. In the left panel choose and click on Family. Inside Family section check box beside Authorize Library Sharing on This Computer. Log out of your account and login into the client user account credentials you wish to share your library with (this is your friend or cousin account, they need to log in to Steam client on your computer but with their credentials). After they have successfully logged in, log them out and re-log with your account again.
Now go again into Steam > Family and now you should see an account in the box at the bottom with the user name or your friend or relative. Confirm that this is an account that you wish to share the library with by clicking on the checkbox next to the name. Now let users login into the desired device with their credentials and they will have access to your entire library. Happy gaming!
What is Active History? A new feature has been introduced in Windows 10 that allows users to stay connected to their tasks across their devices. This new feature is called “Windows Timeline” and using this feature, users could continue their tasks all over their Windows 10 computers as well as on devices that run Android and iOS as well.
This new feature was included in Microsoft Launcher and Microsoft Edge on Android devices as well as in Microsoft Edge for iOS devices. In order for the feature to work, you have to send either Basic or Full data and diagnostics of your computer to Microsoft which would sync it all over your devices with the help of the cloud. And now since all your data is stored on your Windows 10 computer and with Microsoft under your account, it is easier for you to access the back and start where you left off. This kind of option is called Active History. In this post, you will be guided on how you can permanently disable Active History using either the Windows Registry or Group Policy.
Before you go on further, it is recommended that you create a System Restore Point first in case anything goes wrong. This is a precautionary measure you must take so that you can easily undo the changes you’ve made. After creating a System Restore Point, proceed to the given instructions below.
Option 1 – Disable Active History via Registry Editor
Tap the Win + R keys to open the Run dialog box and type in “Regedit” in the field and hit Enter to open the Registry Editor.
Next, navigate to this registry key: ComputerHKEY_LOCAL_MACHINESOFTWAREPoliciesMicrosoftWindowsSystem
From there, check if you can find a DWORD named “PublishUserActivities”. If you can’t find this DWORD, just create one with the same name and make sure that the base is selected to Hexadecimal.
After that, double-click on the DWORD and change its value from 1 to 0 to disable Active History.
Restart your computer to apply the changes you’ve made successfully.
Option 2 – Disable Active History via Group Policy Editor
Note that this second option won’t work if you are using the Home edition of Windows 10. This is because the Group Policy Editor does not come with Windows 10 Home. So if you are not using Windows 10 Home, follow the given steps below.
Tap the Win + R keys to open the Run box.
Then type in “gpedit.msc” in the field and hit Enter to open the Group Policy Editor.
Next, navigate to this path: Computer ConfigurationAdministrative TemplatesSystemOS Policies
After that, double click on the configuration listing named “Allow publishing of User Activities” to open the configuration page which has the following description:
“This policy setting determines whether User Activities can be published. If you enable this policy setting, activities of type User Activity are allowed to be published. If you disable this policy setting, activities of type User Activity are not allowed to be published. Policy change takes effect immediately.”
Now you have to select Disabled or Not Configured if you want to disable Publishing of User Activities or Enabled to Enable Publishing of User Activities depending on your preferences.
Next, click OK and exit the Group Policy Editor and then restart your computer to successfully apply the changes made.
Internal Error 2324 occurs when you try to upgrade Firefox on your Windows 7 PC. The program fails to install and run successfully. The following error message is displayed:
‘The installer encountered an unexpected error installing this package. This may indicate a problem with this package. The error code is 2324.’
Solution
Error Causes
This error may occur due to different reasons. These include:
Viral infection
Bad registry entries (cookies or traces of old version of Firefox program)
Other programs running on your PC during Firefox program installation
Installation was not performed from the Administrator account
To use the Firefox web browser successfully on your PC, you first need to resolve error 2324 on your system.
Further Information and Manual Repair
To repair error 2324, try the following methods:
Method 1 - Perform a Clean Reinstall.
This means to remove the Firefox program completely from your PC and then reinstall it. To do this, remove the Firefox installation folder saved in one of the locations by default:
C:\Program Files\Mozilla Firefox
C:\Program Files (x86)\Mozilla Firefox
Now download the latest Firefox version on your PC and save the setup file on your computer. After that double click, the downloaded installation file and follow the steps illustrated in the wizard to install Firefox on your PC.
Method 2
Sometimes Firefox installation may fail because of the interference from other programs running on your PC. Therefore, it is advisable to close all programs running in the background when upgrading the Firefox program.
You can also disable programs like Logitech QuickCam and Spybot Tea Timer. These are some of the many programs that are notorious for interfering with Firefox updates.
Method 3 - Scan for viruses to resolve.
Viruses are malicious programs that often enter computers through files downloads from unreliable websites and phishing emails. These programs then hide in your PC and infect it.
You may often experience problems during program installation if your PC is infected by viruses. To fix the issue and ensure smooth Firefox program installation on your system, simply run an antivirus.
Antivirus scans and detects all viruses in a few minutes. Upon detection, remove them right away to ensure your PC is free from such malicious programs. Now try updating Firefox on your system again. If it is updated smoothly, then the error is resolved.
Method 4
The registry of your system stores all the activities performed on your PC. You may have uninstalled the old Firefox version from the Control Panel but the traces of the uninstalled program may still remain in the registry as bad entries.
These bad entries may be causing error 2324 to pop up on your PC. To resolve, you need to remove these entries from the registry. For quick removal, download Restoro.
It is a user-friendly PC Fixer with a registry cleaner that scans and removes all obsolete files stored in the registry such as incorrect registry keys, bad entries, cookies, and junk files.
Click here to download Restoro.
As you know, the Office Language Packs need to be installed right after installing Office. It also has to be on the correct version of Office so if any of these conditions are not met, you will most likely get error codes 30053-4 or 30053-39 when you install a language pack in Microsoft Office. If you are currently facing this error, read on as this post will help you fix the problem. Here’s the full context of the error message:
“Something went wrong, Sorry, installation cannot continue because no compatible office products are detected.”
When you have to work on two different languages, that’s where the language packs come in handy. You might have to work on one language but when it comes to proofreading or help, you need another language. Note that some language accessory packs offer partial localization which is why some parts of the Office might show the default language.
If you are using Office 365 or Office 2019, 2016, 2013, or 2010, you need to go to the language accessory pack page from office.com and select your language. Once you see the download link, click on it to start downloading the pack. It includes the display in the chosen language, proofing tools for the selected language, as well as the Help in the selected language. Once the installation is complete, follow each one of the given options below to configure the language accessory pack properly.
Option 1 – Select Editing and Proofing language
You need to open any Office program and navigate to File > Options > Language.
From there, you need to make sure that the language you want to use is in the list under the Choose Editing Languages section.
After that, you can add or remove the language that Office uses for editing and proofing tools.
Option 2 – Configure the Display and Help languages
In this option, you can change the default display and help languages for all the Office applications so whatever you choose will be used for all the buttons, menus, and support of all the programs. After you select the language, restart all the Office applications to apply the changes made successfully.
On the other hand, if you are using Office volume license versions, note that only an administrator account can install this if you are using the Volume License version of Microsoft Office 2016. You have to download the ISO image of the language packs, language interface packs, and the proofing tools from the VLSC or Volume Licensing Service Center. This process can be quite complicated so you might have to go to the docs.microsoft.com page to be guided accordingly. After you installed everything correctly, the error code 30053-4 or 30053-39 should now be fixed.
As we near the end of 2022 we look at the current best antivirus software for popular platforms, why they are the best, and why you should get them.
Avira, a great free Antivirus
Avira has been around a long time with its free antivirus version of the larger protection suite. It had its ups and downs but the latest versions are really great. With high-speed scans and low system impact, Avira antivirus is really one of the best free antivirus software currently on the market.
The software itself has also received UI & UX updates making it straightforward and easy to use. The virus scanning engine is the same as in paid version that ranks among the top engines in the world for this type of work. The package also gives you some great browser protection and a good firewall as well, there is really no excuse to skip on this if you want a free solution.
The only thing that we would say is not so great in Avira is reporting some false positives, sometimes even for MS updates, it is rare but it can happen.
Malwarebytes, a powerful Windows antivirus
Malwarebytes Premium is easy to use, simple antivirus solution that shies away from complicated UI, and simply put, it just works. Its scanning engine is well-known and places among the top and best in the world often finding some malware that other can miss.
Another great thing is its integration with Windows itself, it is one of the rare applications that can and will work incredibly well beside your typical Windows protection tools so you can have both of them running at the same time.
Installation and running are really simple and every typical PC user will find it as easy as walking in the park. On the other hand, sadly system impact is a little high and it will have issues running on lower-end systems due to its memory requirements.
Intego MAC Internet Security X9, the best Mac antivirus
Gone are the days when MAC had no virus issues, since MAC rose in popularity among the users, also rose the number of viruses and malware. The system itself has some great protection built it inside but for more security and better control of it, you will need a third-party dedicated solution.
Intego was made by Mac antivirus experts who have been building this kind of software last 25 years. The interface is easy to use and premade presets are really helpful, but the security suite can also be customized to fit your needs and desires.
Since this is only available as a security suite, you are getting a firewall and some other security tools along with your antivirus that will run as a part of it.
The bad side is that scans can sometimes run slow, most of the time they are OK in terms of speed but occasionally they can switch to slower speeds and impact scanning time to some annoying times. Also, there is no webcam protection nor VPN service included where others on this list have them.
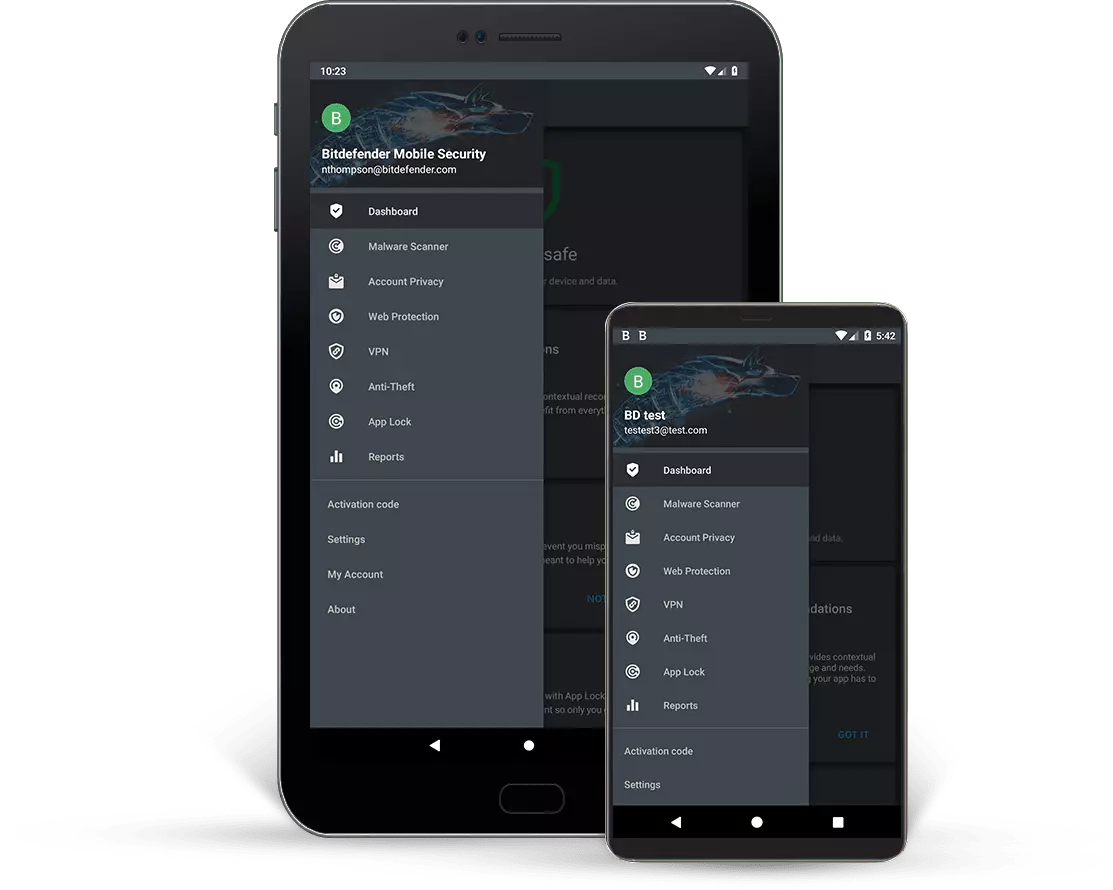
Bitdefender mobile security: best Android protection
While protection is not only needed for your gaming or workstation, software suites that are dealing with mobile and tablet security exist. The best of them is the Bitdefender antivirus mobile suite. Low on system resources and low on performance impact with the really great virus detection rate Bitdefender is at the top of suites for your phone.
Consistent high virus detection packed with low battery impact is great but the suite comes with tons of other tools as well like browser security tools, email protection, and real-time link and notification protection.
The application will always scan each file and newly installed application in the background and alert and cut off any found threat. App itself is easy to install and use and most of the time it will do everything in the background for you but offer you customization if you need it.
The package also includes VPN and application lock that will let you protect the critical applications from being accessed as well as an online account scanner. Anti-theft and anti-loss tools, which allow you to find, remotely lock or wipe a stolen or lost device, add yet another layer of protection.
One thing that is missing from this great package is fraudulent call protection. Newer Android phones have this feature inside but it would be nice if Bitdefender had it as well.
Bitdefender, the best antivirus software
Now that we have covered specific cases of each platform, there is one player that has all of them covered and with a quality product, that player is BitDefender and it is great. Personally, this is my protection suite of choice and as I type this it is running in the background.
Bitdefender has it all, low system impact, as a matter of fact, it is one, if not, the lowest performance impact engine on the market currently and that is packed with a great and highly consistent virus & malware detection suite. Along with real-time malware protection, browser security, and anti-spam tools, you also get anti-phishing defenses, ransomware protection, and a strong firewall.
Bitdefender scores are very high in both the zero-day threat and real-world protection tests at AV-Test, an established organization that tests antivirus software. Despite being tested against tens of thousands of well-known and widespread malware threats, the software consistently achieves a 100% blocking rate.
The suite also comes with a restricted free VPN and with parental controls as well. Webcam and microphone protection are also included in the suite and on top of all, it has great pricing plans and constant discounts.
BitDefender is really a great package and it might sound too good, but after years and years of personally using it I have not had single malware or virus issue, the only thing that I would put as a negative is that system is severely slowed down when system scans are performed so be sure to run or schedule them when you are not using your computer. This, of course, can put some people off and I will admit it is a serious drawback but for me, the security of my workstation is more important than leaving the computer for 20 or so minutes in order to perform a full scan of the system.
It is common knowledge that when you open a file that contains viruses, it will automatically infect the operating system. This is why most antivirus programs like Windows Defender won’t allow the opening of a file or execution of any associated program if they detected that the file or program could potentially harm the computer. In situations like this, you may get an error stating, “Operation did not complete successfully because the file contains a virus”.
In addition, it is also possible that this error message can pop up even for known programs. To open the program or file that triggered the error, you will be given a couple of options in this post but make sure that the program or file is really safe to open and does not contain any virus. You can open the file or execute the program by disabling the Windows Defender or any antivirus program temporarily. You could also try to add an exclusion in your antivirus program or repair File Explorer or run the Disk Cleanup tool. For more details, refer to each one of the options provided below.
Option 1 – Try to temporarily disable the Windows Defender program
Although you could encounter this error with any antivirus program, it is more common in Windows Defender. Thus, you can try to disable it for a while when you open the file or execute the program. To do so, follow these steps:
First, click on the Start button and go to Settings > Update and Security > Windows Security.
Here, select the “Open Windows Security” option located in the right pane.
After that, click on the “Virus and threat protection” option.
Next, click on Manage settings under the Virus and threat protection settings.
Then turn off the switch for both Real-time protection and Cloud-delivered protection.
Now restart your computer and try to open the file or execute the program again and see if it works.
Note: Do not forget to enable the Real-time protection and Cloud-delivered protection back in Windows Defender.
Option 2 – Try adding an exclusion in the Windows Defender program
Open the Windows Defender Security Center from the system tray area.
Next, click the “Virus & threat protection” option and then open the “Virus and threat protection settings”.
After that, scroll down until you find the “Exclusions” and click on the “Add or remove exclusions” option.
Then click the plus button and select the type of exclusion you want to add and from the drop-down list, select Folder.
Next, navigate to the path where the file or program is located.
When a User Account Control or UAC prompt, just click on Yes to proceed.
Now try to run the program or file again and see if it worked. If it did, then make sure to turn on your antivirus. However, if it didn’t work, proceed to the next given options below.
Option 3 – Try to run a System File Checker scan
System File Checker or SFC is a built-in command utility that helps in restoring corrupted files as well as missing files. It replaces bad and corrupted system files with good system files that might be the cause why you’re getting the errors 0x8024a11a and 0x8024a112. To run the SFC command, follow the steps given below.
Type “cmd” in the Start search and then right-click on the appropriate search result.
Next, select “Run as administrator” to open Command Prompt with admin privileges.
After opening Command Prompt, type in sfc /scannow
The command will start a system scan which will take a few whiles before it finishes. Once it’s done, you could get the following results:
Windows Resource Protection did not find any integrity violations.
Windows Resource Protection found corrupt files and successfully repaired them.
Windows Resource Protection found corrupt files but was unable to fix some of them.
Now restart your computer and see if the problem is fixed or not.
Option 4 – Run the Disk Cleanup tool
You can also try using the Disk Cleanup tool. To use it, refer to these steps:
Tap the Win + R keys to open the Run dialog box and then type “cleanmgr” in the field and hit Enter to open the Disk Cleanup window.
After that, select the drive you want to clean.
Now click OK to clean the disk and restart your computer.
Google fonts are a free open-source font library made to enrich web content and present end-user with a smooth web experience while surfing. Fonts are completely free for both commercial and personal use and they are not limited to use in WEB only, you can use them also in other projects like business cards, flyers, etc.
In order to use google fonts first thing of course you will need to download them. In this guide, we will show you how to download and install google fonts.
Select the font family that you wish to use. You can preview each font style to make double-sure it is the right one.
When you are ready, click on the Download family button.
A File Explorer window will pop up, asking you where to save the font family.
The downloaded file will be compressed in .zip format to save bandwidth, so you will first need to uncompress/unzip it. Right-click on the file and select Extract all.
You will then be asked where to unzip/extract the file. File Explorer will automatically create a new subfolder, named as the file name, so all you need to do is confirm it by clicking Extract.
Click on the Windows icon in the bottom-left corner of your desktop
Select the Personalization category and Fonts.
Split the screen between File Explorer and Settings by dragging the windows to either the left or right edge of the screen. Select all the font files by pressing CTRL + A and drag them into the Add fonts box.

 Well, you can and it is not complicated as well. Follow this easy guide to see how can you get someone’s account up and running with some of your games.